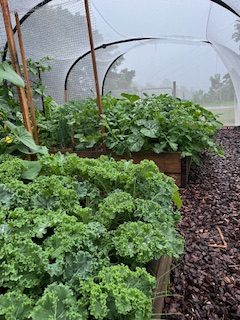
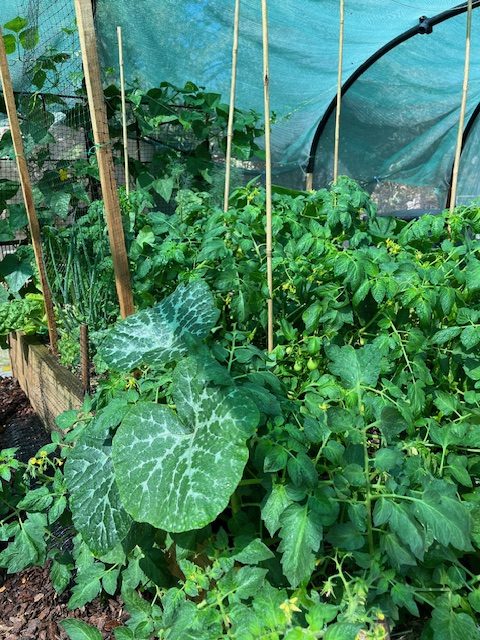
Building a veggie garden tunnel is a fantastic way to protect your plants from pests and harsh weather while creating an attractive feature in your garden. We have a problem with a large population of scrub turkeys up here. Cute guys with a fascinating life cycle, but they are incredibly destructive.
Just ask anyone who lives in a region with these bizarre birds and they will have a story to share about a whole garden bed being relocated in one afternoon for a nest mound. They are remarkable but very focused and will destroy your veggie gardens before you can blink! If you look at any of the areas we have cultivated up here, there are netting, fencing, and other precautions.
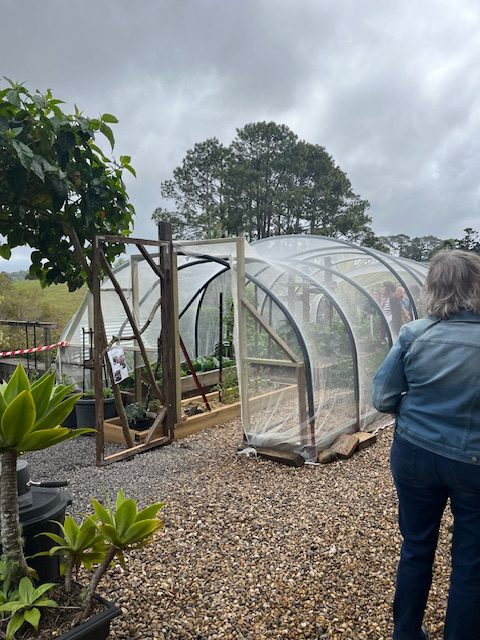
I went to our local gardening on the edge tour with some friends to see several beautiful local gardens to experience what they were doing and was fortunate enough to see a tunnel built by a local to protect some of his veggie gardens near his house, I came home so inspired we got to it and built one of our own.
Since then I’ve had so many people ask how I built it, that I thought I’d share a step-by-step guide on how to build one using garden stakes, agi pipe for arches, and netting.
Materials Needed
– Garden stakes (length depending on the height of the tunnel)
– Agi pipe (flexible drainage pipe, length depending on the size of the tunnel)
– 10×10 meter garden netting, Bunning’s or Amazon
– Bricks or heavy stones
– Cable ties or garden wire
– Scissors or a sharp knife
– Measuring tape
1. Planning and Measurement
Measure the Area: Measure the area where you want to build the tunnel. It should be 10 meters in length to match the netting size.
– Mark the Layout: Mark the ground along the length where the garden stakes will go.
2. Installing the Garden Stakes
Drive Stakes: Hammer the garden stakes into the ground along the marked lines. Ensure they are evenly spaced and firmly in the ground. The distance between the stakes will depend on the width of your tunnel.
3. Creating the Arches
Cut Agi Pipe: Cut the agi pipe into lengths that will form arches from one garden stake to the opposite stake.
Attach Agi Pipe: Slide one end of the agi pipe over a garden stake, bend it into an arch, and slide the other end over the opposite stake. Repeat this for each set of stakes.
4. Covering with Netting
Drape Netting: Unroll the 10×10 meter netting and drape it over the agi pipe arches. Make sure it covers the entire structure.
Secure Netting: Attach the netting to the garden stakes and agi pipes using cable ties or garden wire. Ensure it’s tight and secure.
5. Anchoring the Netting
Position Bricks: I just placed bricks or heavy stones around the sides of the netting on the ground. This will anchor the netting and prevent it from lifting in the wind. I like to use bricks instead of tent pegs or other anchors that require piercing the netting. Up here we get strong wind and it wouldn’t take much for the netting to tear. I have also placed cardboard between the brick and the netting if the brick is especially rough.
6. Access door
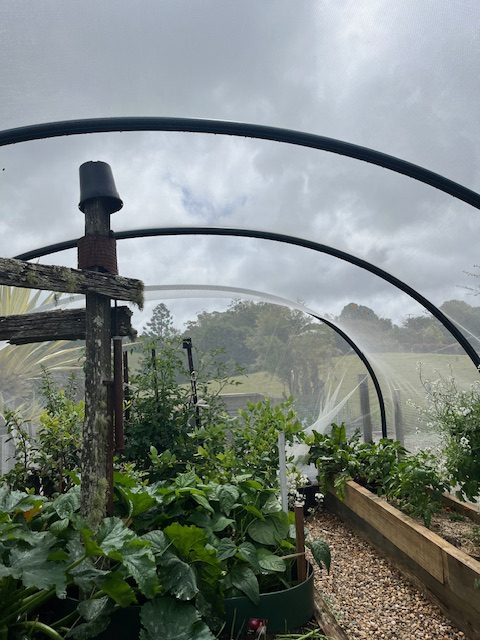
Create Access door: I have one end closest to the house which is the area I will always access from. I create a door by gathering the netting up and carefully tying it to the agi pipe arch. This forms a tent door which I peg together for quick and easy access. The person I got the tunnel idea from has created a beautiful door out of branches with a door frame. (see image above) I’m just not that handy, so the tent door works just fine for me.
7. Maintenance
Regular Checks: Regularly check the stability of the tunnel and the condition of the netting. Repair or tighten as needed. Just a heads up here, no matter what you do, you will get tears in your netting, I always have a needle and thread handy to stitch it up. Easy to fix and keeps it from turning into a major job once there are lots of holes.
8. Planting
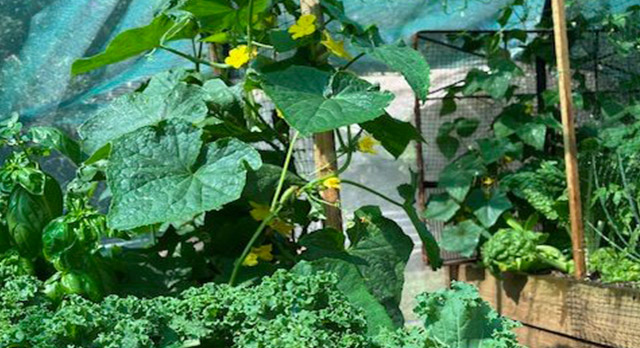
Plant your Garden: Now that your tunnel is ready, you can start planting your vegetables inside. I have 3 raised beds inside my tunnel. I use this location primarily for greens like lettuce, silver beet, kale, etc. It’s a bit harder to grow veggies in a tunnel that relies on bees or other insects for pollination. Mind you, I have managed to hand-pollinate self-seeded cucumbers, zucchini, and pumpkin in my tunnel. But you will need to be prepared to hand pollinate if you need to/want to grow certain plants in there.
Tips
Choose the Right Location: Ensure the tunnel is in a spot that gets adequate sunlight and is protected from strong winds. Not always an easy task, we live on an exposed hill so wind is a given up here, but we allow for it. The beauty of the netting is the wind goes straight through.
Add shade cloth: Our tunnel is in an area where we have full sun until 4 pm in summer so I have a length of shade cloth I can drag over the structure on the hottest days. Luckily up here we rarely see days hot enough to do damage but we get the occasional run of 30-degree days that will burn young lettuces or spinach. I tie the shade cloth in place with tie wire and remove it when the temperatures again.
By following these steps, you’ll have a functional and durable veggie garden tunnel that not only protects your plants but also adds a unique element to your garden. I love this structure because not only is it functional, but it’s easily disassembled if needed.
Until next time
Lucy
